Monday, February 6, 2023

 So it's been a slow go on this project.  I've only been doing some small work at random.  To get everything caught up, I'll just run through what's been done over the last couple months.

Not sure I mentioned this, but I managed to obtain the coveted raised letter Centuri coin door.  Since it was in bad shape, I had it sand blasted along with the control panel and other metal bits from the cabinet.  Then had all of that powder coated. Plan is to sand down the raised surface of the Centuri plate to restore  the original brushed metal look to the letters.


In addition, I've spent a good deal of time now filling and sanding, then filling and sanding, maybe 5 or 6 different rounds total, to get the cabinet repairs and edges smooth.  I'd say I'm very close to having it ready for a coat of black paint.  Some time ago, I placed an order for a set of stencils to completely restore the side art, but knowing the source and how quickly they move to fill orders, it could be a year or more before I see those arrive.  Here are some random shots of the efforts I've put into cleaning up the cabinet.


Sunday, December 4, 2022

 Like so many of these forty year old cabinets, this one is crumbly and swollen from water damage.  In addition to all the damaged particle board, all the metal parts are lightly rusted, its almost like it was left out in the rain.


As much as I hated to do it, the lower half of this cabinet would need replaced.  This would then require a re-stencil of the side art.  Also the top panel, lower back panel, and back door would need replaced.

Below are a few pics of the progress so far.  Also the metal plates used to mount the missing leg levelers needed soaked in Evaporust for several days.  After they were cleaned up, they were bolted back in place, then four new leg levelers were installed.


These new pieces are held firm with wood glue and biscuits.  Using the router helps keep the cuts perfectly strait, and will make blending in the new wood simple.


One fortunate aspect of the Gyruss cabinet, all the panels are bolted in, and easy to remove.  However, every bolt requires soaking to remove the rust, and will require sanding and painting.


Tuesday, November 29, 2022

Double the fun with Gyruss

"I don't look for projects any more, they look for me." While I can't be certain, it seems I've heard some form of that statement before.  Honestly until the moment I began writing this post, I hadn't given it any thought, or even tried to understand what those crazies were saying.  Speaking of crazies...

Jeff Davis, a new-ish arcade collector, had this busted and trashed Gyruss sitting in his garage.  There wasn't much hope for it really.  There were several parts missing, the monitor tube and frame were there, but not the chassis or neck board.  The wiring harness had been hacked, a switching power supply added, then removed.  Experience told me this cabinet was likely to be scrapped or parted out, which I felt was unfortunate.  Luckily another Gyruss became available, in somewhat better condition, although fortunately for me, also not working.  After fixing up Jeff's second Gyruss, I was gifted the other.  Not to worry, although I haven't done a major restore since the Pandemic Lockdowns, I felt I would eventually get around to this one.

Work on this crap has been tedious.  I've been reluctant to start a post about it, figuring my interest would fade.  However, I've made an effort to spend a minimum of an hour on this each Saturday, so with that, I've managed to maintain what I now call "forward momentum".

Anyway, it's getting late, so for now, I'll just post a few pics.
I call these, "water damage and missing leg levelers".


Monday, October 26, 2020

Nanao MC-2000 from Turbo

Just now making an effort to sort out any remaining issues with this Turbo.  While I'm doing minor repairs, I'm also trying to clean the inside of the cabinet, piece-meal, since it's just too big of a job to be done all at once.

Earlier in the week I placed an order for the needed capacitors for the Nanao 20" monitor.  So when the parts arrived on Friday, I pulled the monitor and took it outside for a deep cleaning.  After discharging the tube with a high-voltage probe,  I soaked the tube and chassis down with simple green and used a paint brush to loosen the accumulated dust and grime.  This all gets rinsed down heavily with the garden hose, without a sprayer attachment.  Finally I rinse all of that down with 90% alcohol, followed up with compressed air. 


The monitor was working well enough, with only the occasional wave pattern at the top 1/8 of the screen.  Now that the board was visible again, I notice this burned patch in the front right corner:


When I touched the diode at D505 it was moving around freely.  After removing and testing the two diodes, resistors, and one transistor at Q504, I found D506, R223, and Q504 were all bad.  The emitter leg of Q504 was blown completely away.  Here's a closeup of the drawings for that circuit:


This section controls the Horizontal Position, evidently the damage is not bad enough to make the display unacceptable.  At this point I have to assume perhaps the diode at D506 developed a cold solder joint, which led to the overheating and eventual failure of the stressed components.  That's my theory anyway, so I've placed an order for replacements.  Damn, what an ordeal choosing those turned out to be.

For the time being, I continued replacing the capacitors, which for this chassis was pretty simple.  During this process, testing the ESR, and capacitance, revealed several were bad, most were considerably out of spec.  According to sources, C523 (47uf@50v), located in the high voltage cage, should be replaced with a 100uf@50v, and some suggest replacing the tantalum cap at C408 with a 10uf electrolytic, which I had on-hand.  Evidently this tantalum fails frequently, then you end up with vertical collapse. At my age I can't afford vertical collapse, so the cap was replaced.

Once the new caps were installed, I cleaned an insane amount of old flux from the bottom of the board. 

Any switches and pots on the board ended up being sprayed with Deoxit, as a preventative measure.  I also lightly sprayed the board surface, assuming the mineral oil in the Deoxit can protect the surface from any future problems.

So here it sits, looking very clean now, waiting for those few parts to arrive:


Tuesday, October 20, 2020

Organized Chaos

 More work on Turbo

The engineers at Sega probably knew exactly what they were up against.  However, this game, and the layout of components strikes me as laughably convoluted.


They've got this massive transformer putting out numerous voltages.  Then a switching power supply which only serves +5V, presumably for the logic board.  Next they have a board with three bridge rectifiers, and three 12 volt linear regulators.  There are numerous AC voltages going here and there for light bulbs and sensors, and various other accessories.  They follow all of that up with a very unique little audio amplifier.  

Today, coating all of that, sits 38 years of dust, and who knows what.  If this were a fine wine, I would describe it as smelling like 40 year old ashtray, and the garbage below my high school gym bleachers.

Over the years, I've learned to carefully sort through the bits and pieces in the bottom of these cabinets prior to donning a respirator and hitting the whole mess with the shop vac.  Often the pieces I find are needed later to repair or reassemble some small component.  On some occasions it's been a small spring or clamp that saves the day from total disaster.  Below, a pic of the parts pulled from the filthy recesses of this cabinet:

Notice the two pcb brackets?

As mentioned in an earlier post, this game wasn't doing the best when it came to sound production.  Part of the problem was the 12" woofer.  Even after repairing the speaker, there remained an annoying electrical hum, which overpowered the in-game sounds.

In hopes of cleaning up the sound issues, I decided to replace the old capacitors in the linear power assembly board (834-0120), and the stereo amplifier (834-0121).  

Some people like to replace every single capacitor they find.  Others insist they not be replaced, and that the old capacitors aren't a problem.  I tend to get better results when I carefully work through the power supply, replacing whatever I can.  So to help put this dilemma to rest (at least in my mind), I purchased a capacitor tester.  I chose the Atlas ESR+ by Peak.  In truth, I find that more than half of the old capacitors are indeed good.  In this case, I replaced all capacitors on the two boards, and only found two were bad.  Some had a slightly worse than normal ESR, and others were off when it came to capacitance.

This also gave me the opportunity to clean the gunk away from the boards, as well as the general area around the power supply assembly. 

Here is a shot of the bottom of the linear board, which had to be desoldered, then worked on, then re-soldered back in place.

Yes 15 fidgety little wires 


Here are some before and after shots of the two boards, followed up with a final shot of the power "brick" as it now sits.  Still lots more cleaning and tidying to do.


Yes, still very dirty, but an order of magnitude less dirty.


Monday, October 19, 2020

Sound improvements to Sega Turbo

The Sega Turbo I picked up at last years Free Play was in decent shape, but needed a little TLC, particularly in it's audio department.

"No expense spared," would seem to be the spirit held by the engineers at Sega when designing this classic game.  They added a 12" woofer to provide just that little bit of added bass when passing through tunnels.  This is the second Turbo I've owned, and in both cabinets, the woofer surround had disintegrated.

I wanted to preserve the original speaker, so I started researching speaker repair options.  Thanks to YouTube, that didn't take long.  I quickly located a kit from Simply Speakers.  Part number, for those interested, was the FSK-12F-1 (Single).

The kit included a brush, glue, the foam surround, and a nice set of instructions.  Here are a few pics of the kit, and the sad state of the 12" woofer:


The process was pretty simple, since the majority of the old foam surround had dissolved entirely.  With a nice sharp box cutter, I removed the thick cardboard material around the outer frame. Carefully setting those pieces aside, I then continued to scrape away the remaining glue and bits of old foam.  As you can see, the paper cone was in excellent condition.


Once I had it down to a nice clean surface, it was a simple matter of gluing the new foam surround to the cone.  After this had dried for several hours, I came back and glued the outer edge of the foam to the frame, then glued the thick pieces of insulating material back to the outer rim.  After allowing this to dry overnight, I cleaned up the dust and any crud with a damp cloth.  


In the end, the newly repaired speaker looks great, and sounds great.  Well it sounds original, great is an overstatement.  Let's just say it sounds like it should.  I highly recommend this process to anyone, the original speaker is totally worth saving for this little bit of effort.


Wednesday, July 15, 2020

Star Castle

As a child in the late 70's early 80's there were certain things that just had a cool factor all their own.  Unless you were right there, at that very moment, enveloped in all that was good and bad, terrific and tacky, it's not easy to understand.  Video arcade machines by Cinematronics had a certain edgy appeal at the time.  I'm thinking it was a combination of the sketchy artwork, the quirky game play mechanics, and the garish sound effects.  At any other time it may not have worked, but for that time period it all just clicked.

So for quite some time I've been trying to assemble at least one working Cinematronics game.  

In September of 2019, I traded my restored Donkey Kong for two projects, an Atari Tempest, and a Cinematronics Star Castle.

The Tempest was in pretty good condition but needed some board work and some small amount of TLC, more on that later.

The Star Castle however, was awful.  Which is likely the only reason it ever ended up in my hands in the first place.  I say awful, but in reality, it's something of a blessing to have all of the parts actually together in one spot.  Having been produced in 1980, most of these have long since retired to the local landfill.


Having repaired a couple of Vectorbeam monitors, (which are unique to Cinematronics games, and a huge pain in the ass) I felt confident I could restore the Star Castle regardless of condition.

This is one of those "After the Fact" posts.  So rest easy, it won't be terribly detailed.

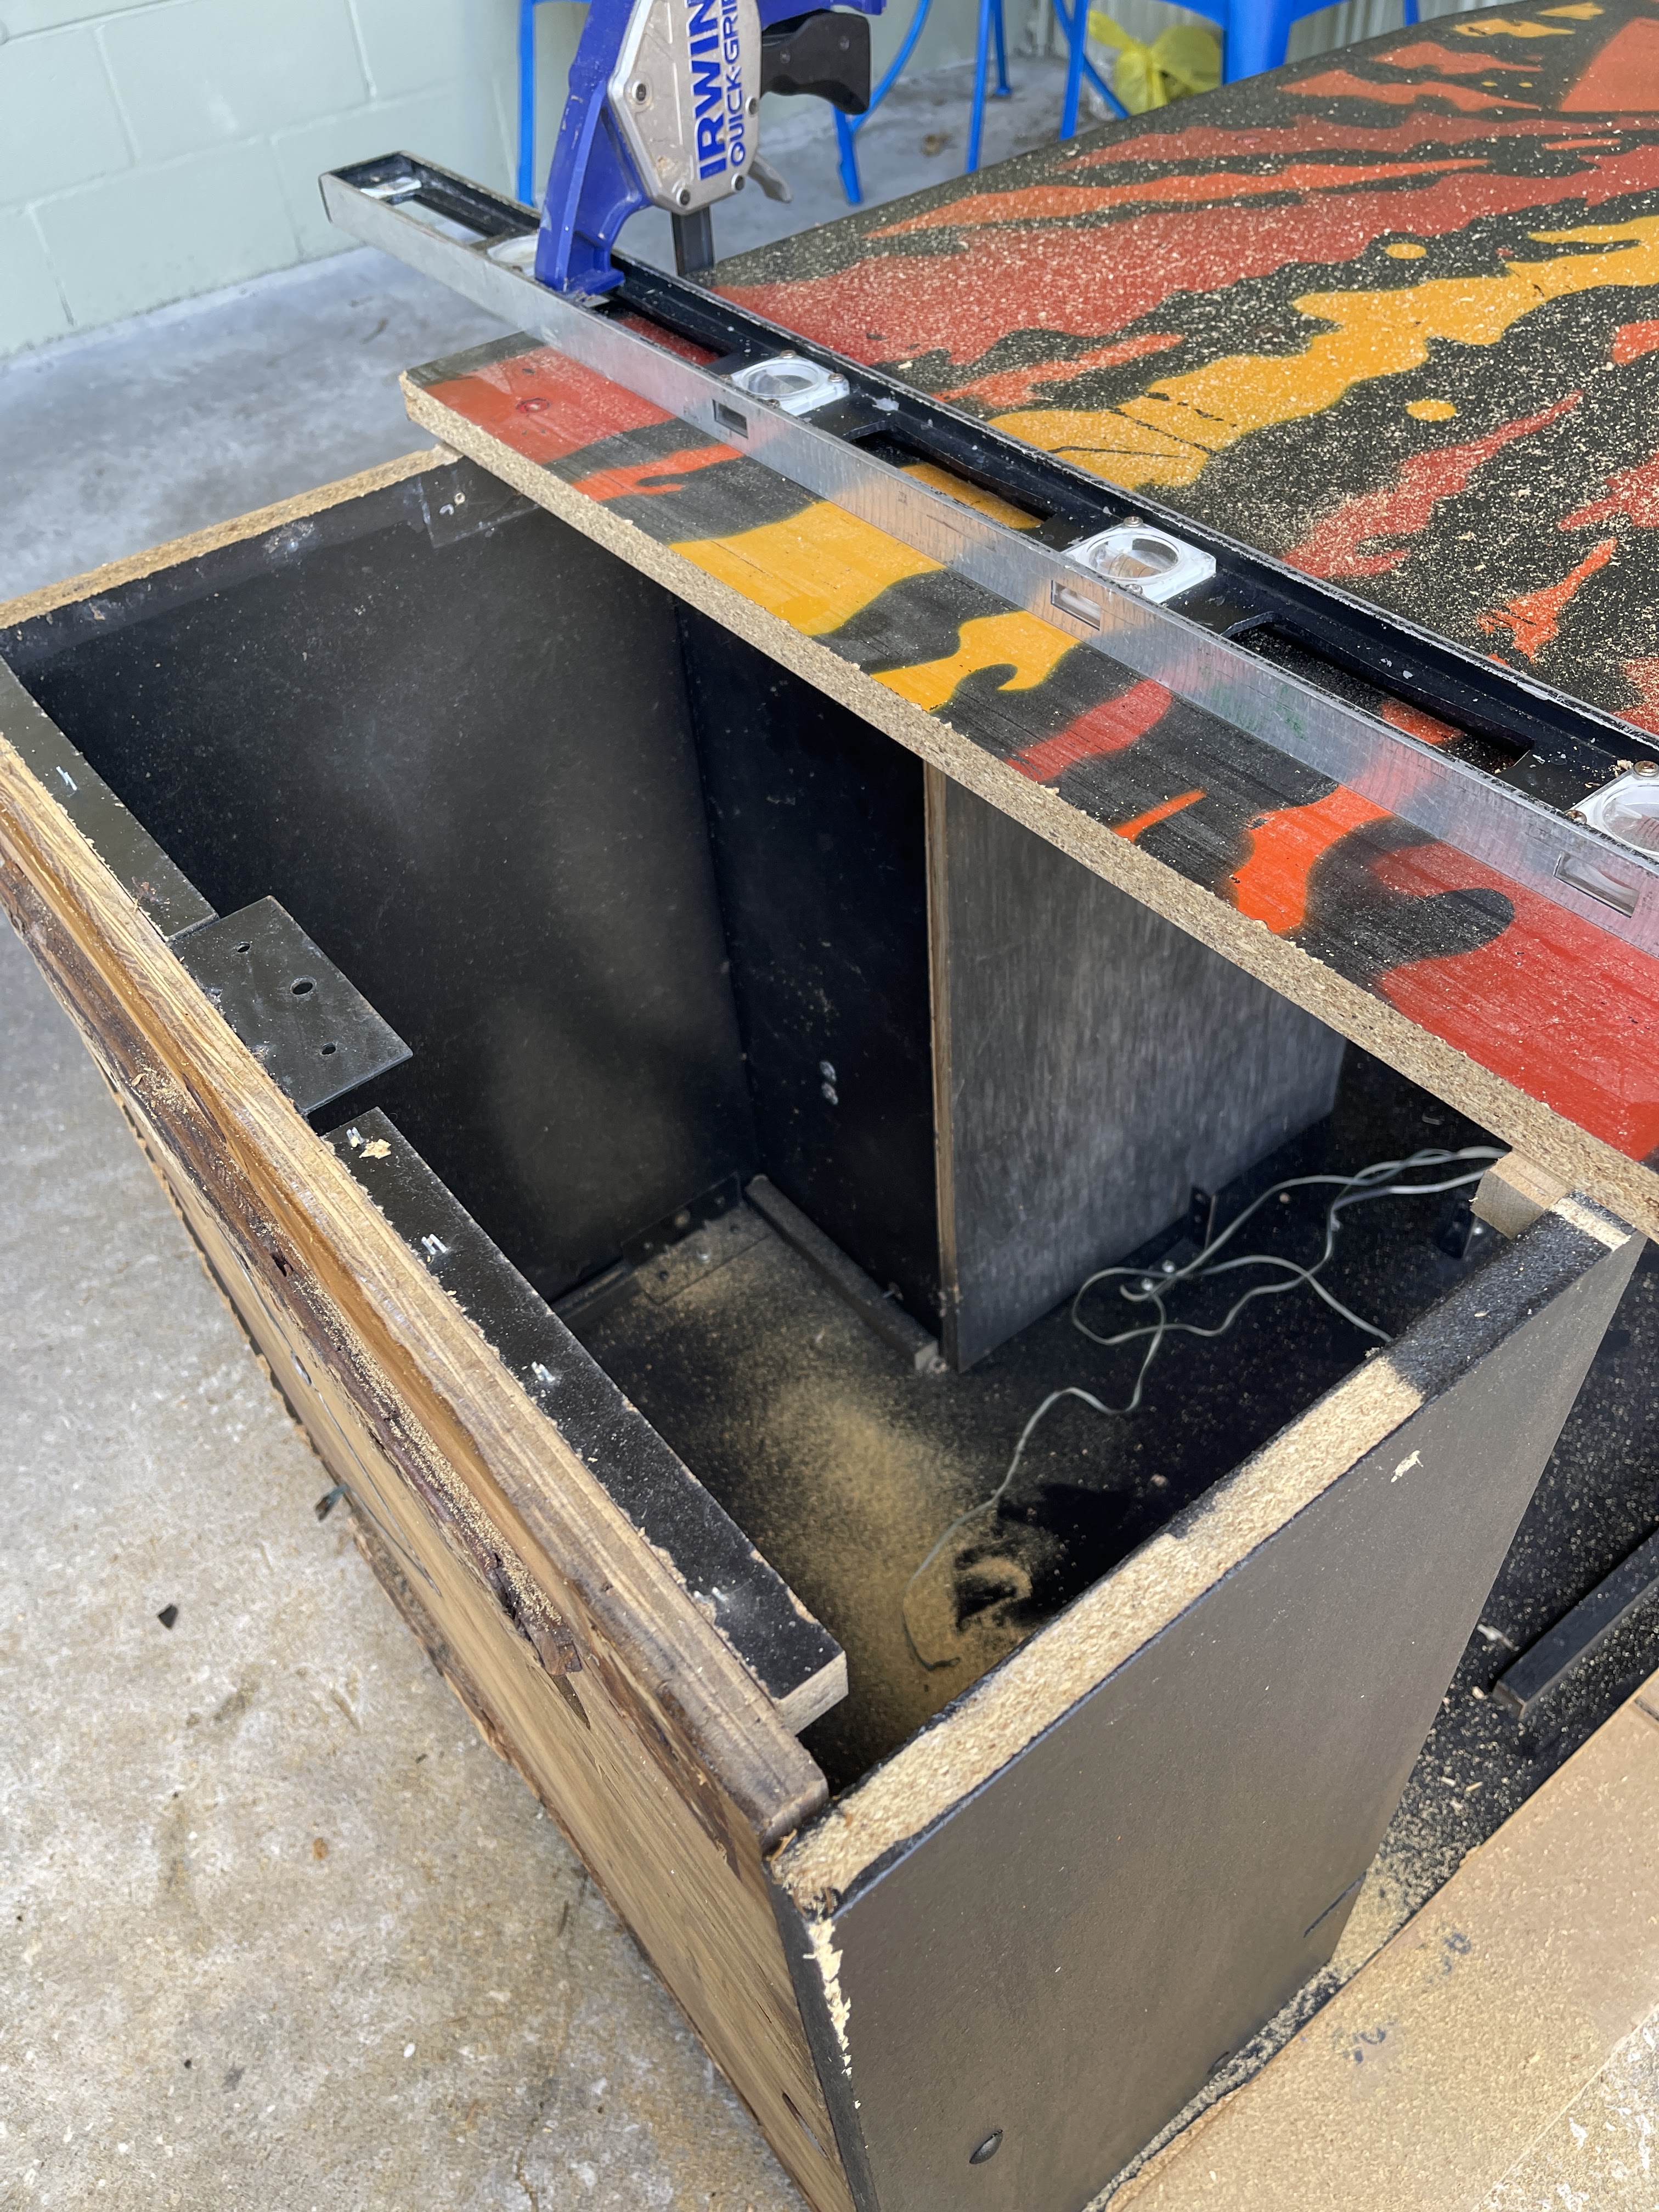
The cabinet was toast.  Picture forty year old particle board, that's been rained on, stored in humid environments, and made home to all manner of vermin.

Normally I'll just hack away the bad wood, and replace the water damaged pieces.  No worries.

If a cabinet is so far gone that it just needs to be burned, that makes the decision to construct a new cabinet an easy one.  If, like this cabinet, the original side art is intact, or only parts of the cabinet are water damaged, it takes some hard choices.  Do you go scorched earth, and start over, or try to save whats left?  It's only original once.  

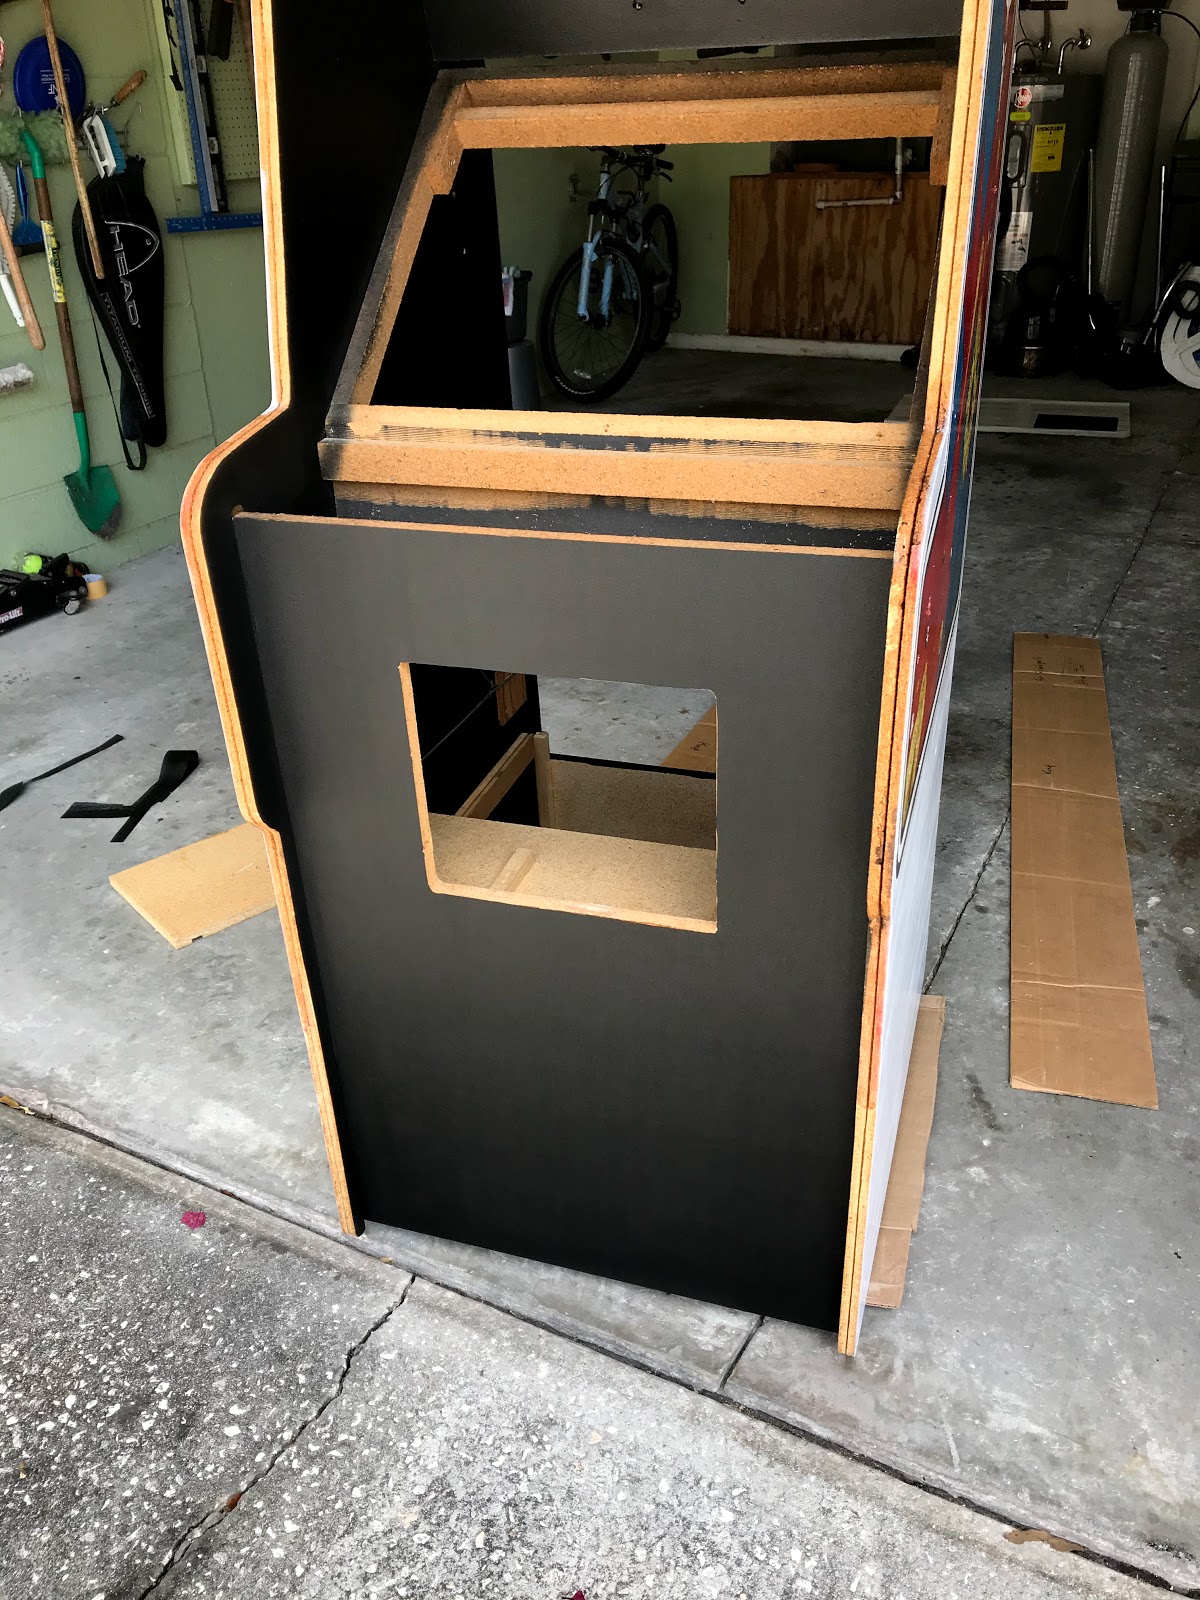
These cabinets are unique in having a black textured vinyl on the inner surfaces.  Reproduction vinyl is available, but expensive and difficult to match exactly.  For this reason I debated on the restoration for a few months.  

The bottom had fallen out of the cabinet due to water damage, and the whole thing was nearly impossible to move without parts falling off.  


Then one day during the covid-19 pandemic I just decided to break out the circular saw, and hack away all the damaged wood.  I followed the normal course of action and rebuilt the bottom with 3/4 inch plywood and the now missing sides with particle board and a biscuit joiner.  The internal blocking was replaced with similar 1/2 inch pine and stapled in place like the originals.


Once this was done, and I had the cabinet up and standing again, it was easy to see the way forward.

Taking a chance I ordered about 6 feet of the textured vinyl from QuarterArcade.

After cleaning the side art really well, I decided to use a method from Frizzelfried of KLOV forum notoriety.  He had suggested this once before when I restored an Atari Garvitar.  By masking, then cutting along the edge of the artwork, and peeling away the outer vinyl, the surface can then be repaired, prepped, and painted to match the original vinyl surface.


This looks easy but to achieve a good finish actually takes a great deal of effort.  The surface has to be primed well, and many, many days of sanding and filling will follow.


The front panel needed to be one seamless piece of vinyl.  I stripped the remaining vinyl from the front of the cabinet then filled the lock bar holes and any other damage with bondo.  Sanded down and filled the transitions between new wood and old, then applied the new vinyl.


Below is a shot of the front edges near the control panel.  Here, and in other places, the vinyl covering is cracked and peeling.  It generally looks shabby.  I decided to attempt a surgical removal of the old, keeping the edges as cleanly cut as possible, then patching in new vinyl.  Keeping the edges below the control panel would help hide the repair once the cabinet was fully assembled.


The patching was a success, and the new vinyl was the exact same texture as the old.  Hats off to Quarter Arcade for providing this excellent material.

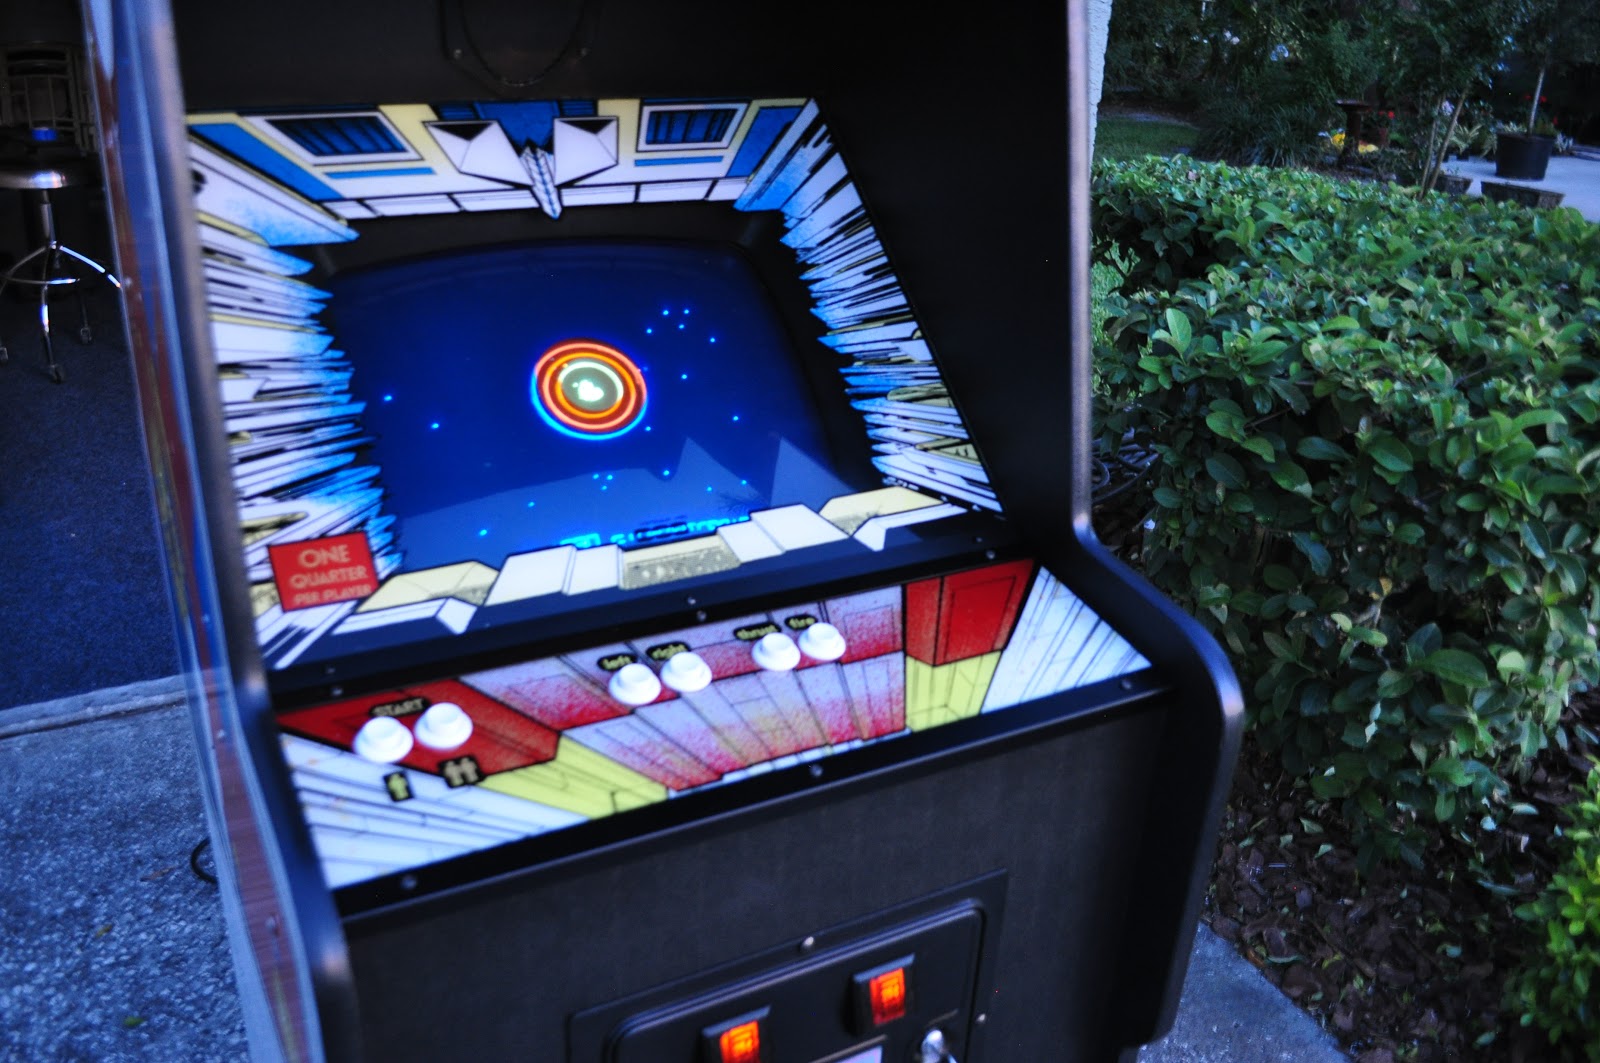
During all of this, I was addressing the issues with the control panel and bezel artwork.  At some point in the past, someone had used black spray paint to touch up the cabinet.  It's hard to see in the photos, but both the control panel and the marquee had major black over spray around all the edges.  To resolve this I used Bar Keepers Friend and lots of elbow grease.  This had the added benefit of cleaning up a good percentage of the cigarette burns as well.

The metal parts got sand blasted and powder coated.  The dingy old buttons were replaced with new reproductions.  

The coin door and it's decal, fortunately were in good shape and only needed a light spray to touch up.


The most daunting was probably the colored gel graphic which overlays the monitor.  This had years of duct tape grime and took slow careful work with Simple Green to remove without damaging the thin colored layer.

Sadly, it was around this time I learned the man credited with designing Star Castle, Tim Skelly, had passed away. Tony Temple over at The Arcade Blogger, wrote an excellent article on Tim, and it's worth reading.

Have a look at the final product, it certainly turned out better than I could've expected.