Sunday, April 24, 2011

New Caps

Friday I took a little time and recapped the Gravitar board.  The one 2.2 uF tantalum cap at C110 which had been shorted, and burned so badly on the board, was also replaced.  It still wouldn't display when I tested it in the Space Duel cabinet.  I checked the x and y outputs and the x was way low, around .6 something.  So I got online and ordered up the TL082 chips and sockets.

The garage was really looking like crap, there was just too much disorganization and mess going on.  The trashed out Zaxxon cabinet was in the way, and other various junk, that just wouldn't allow me to get much done.  So sometime around Saturday morning, I slammed back an energy drink and got down to cleaning up the mess and getting rid of stuff.  It turned out great, the garage is organized and the game room / work area is looking better than ever.

Sunday afternoon, I managed to get the AR II board rebuilt, and refreshed.  Here's a shot of it looking good with the new parts.

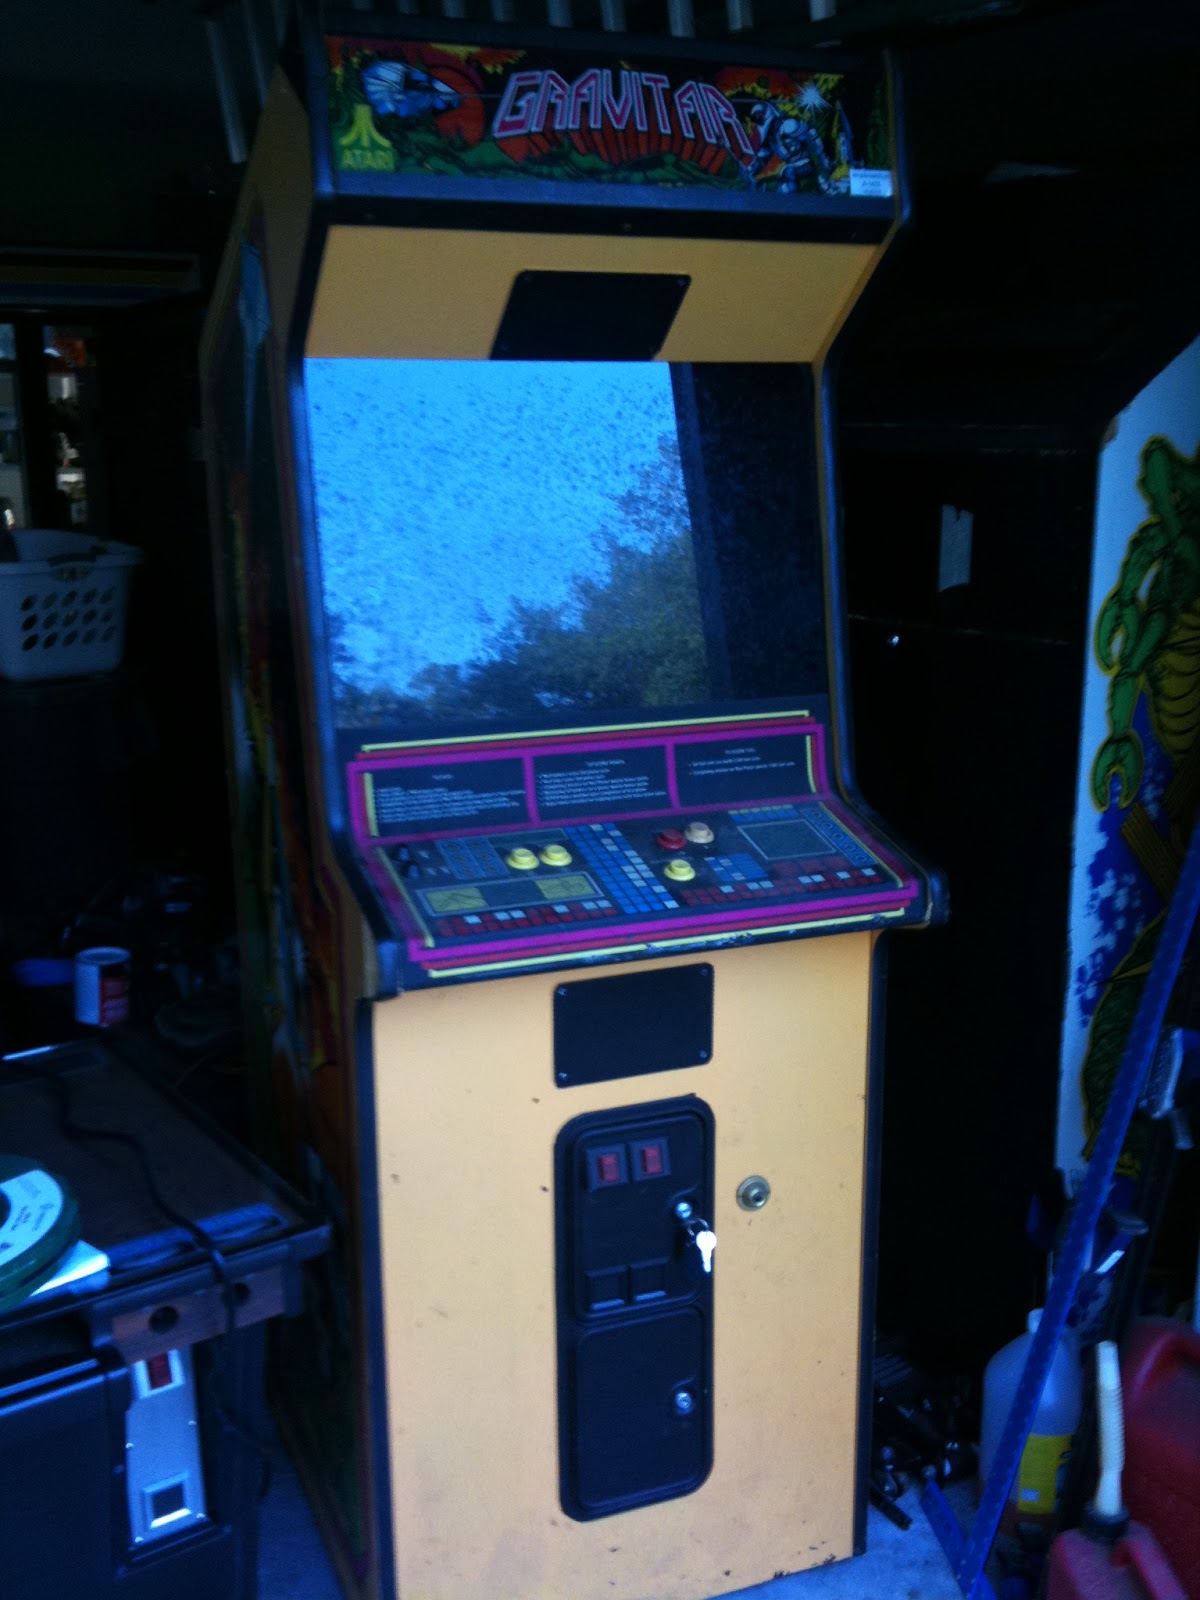
So as soon as I get a little time, I plan to clean up the bottom of the cabinet and rebuild the power brick, with new fuses, and a new big blue.  Hopefully the TL802's will do the trick for the main board and I'll have a working Gravitar by next weekend. =)

Thursday, April 21, 2011

First Work

The monitor that came with this game was in three pieces. So I decided to drop it off at Atari Jim's place. I really needed to find out if the monitor was going to be salvageable before going any further. So as soon as I got home from work, I gathered up the parts and headed over to Jim's. He seemed optimistic, so I'll move forward on this project, and wait to hear from him.

I cleaned the cabinet, inside and out tonite. I scrubbed down the artwork with Simple Green and a Magic Eraser. Surprisingly, almost all of what looked to be damage to the artwork was just dirt, and paint. I'm quite happy with the condition of the side art.

I removed the doorbell credit button from the front of the cabinet. I also cleaned the control panel. I'm not happy with the control panel, it's kinda beat. So I hope there's a reproduction available.

Atari Color Vector Added

An operator in St. Pete was selling off a load of games in a warehouse, and from the photos I could see that he had several very old machines.  After talking to him on the phone for a few minutes I figured I'd better get over there and check it out. 

This was my first time visiting a warehouse, and man was this place sweet.  It was the proverbial "honey hole" as they say.  Mind you, all of it was junk, nothing really in working order, but lots of the more rare items to be had. 

After scouting around in the maze of old games I decided on this Atari color vector called Gravitar.  The cabinet is identical to Space Duel and from the looks of it should clean up nicely.  The game was originally white, someone has masked off the artwork and speakers and painted it a sherbet orange color. 

So far I have removed the boardset and tested it in my Space Duel.  The two are compatible as far as power supply and harness so it's an easy swap.  No surprise, the board will need worked on, as it only came up for a brief moment showing the Gravitar logo, then went black.


The artwork is in pretty good condition.  There is one chunk of particle board missing near the control panel on the left side, and the very top corner, near the marquee is broken and will need filled in and replaced.  Other than that, the cabinet should look good after a little bondo, sanding and painting.

It's not often that a color vector comes along, so this is one game I am very happy to have scored.  It's an awesome addition to the collection.

Wednesday, April 13, 2011

Some Assembly Required

Not much to talk about really. I have most of the base pieces cut out and laminated. Here are a few shots of the base as it's coming together.


I may have over engineered the base a little, but I hate a wobbly cabinet. I used the full plates for the leg levelers and all galvanized hardware.

At this point I'm happy with how the laminate is looking. I'm a little concerned about drilling through it to install the coin door lock.

I have to re-cut the woodgrain piece that fits above the coin door, so once that's done and laminated, I'll attach the right hand side.

Saturday, April 9, 2011

First Try Laminating

Since the old Zaxxon, like many Sega games from back in the day, had a woodgrain finish, I decided to try my hand at using laminate to duplicate the look.  The laminiate would be more durable than the original contact paper, and it should look pretty slick.

My first attempt at applying the laminate was pretty much a piece of cake.  Basiclly you brush the contact cement onto the wood.  Brush contact cement onto the back of the laminate piece, then with the help of a roller, press down firmly on the laminate until it's firmly attached to the wood.  Go once over the edges with a flush cut router, and you're done.  Its far easier than painting.  As of cost, I'd guess the laminate is a little more expensive, but likely not by much.  Here's a pic of the first few pieces for the base of the cabinet.


I managed to find the time to cut out the majority of pieces for the base of the cab.  I also laminated both sides and the coin door pieces.  Late in the day I started to assemble the base of the cabinet, and after making two or three stupid mistakes decided it was time to call it a day.  Here's a pic of the new coin bucket divider for the base.  With any luck I'll get the base put together on Sunday.


Sunday, April 3, 2011

Some small progress

One thing I need to change about myself is the way I approach these projects. I typically think of the various things that need done in a linear fashion. Naturally I break the project into many small tasks. That's where the problems start. When one task is held up, i let it hold up the entire project, rather than moving on to the things I can do. So for this Zaxxon resto, I'm trying to break out of that mold.

I ordered laminate at Lowes earlier in the week. Well that won't arrive for about ten days. I really wanted to get started on the cabinet, but that's going to be on hold for a bit.

This weekend I started by taking apart the coin mechs, and stripping the paint from the metal parts. Here's a shot of the parts and the flight controller from the control panel. I'd prefer to get these parts powder coated, but haven't yet found a local shop.

The original monitor, as I said in an earlier post, had a busted tube. I wanted to get it working again if possible, so I called up Atari Jim to see if he had any spare tubes. He said he had one that would work, but that it had the usual screen burn. I figured what the hell, a working spare monitor would be cool. I dropped it off at his place and he called me back the next morning. When I got there he had the monitor working great. He replaced the caps, and reflowed the header pins, I believe he replaced one of the deflection boards too. Anyway he wasn't real happy with the results, which I still don't understand because the picture looked pretty good, and I can either use it as a spare, or put it back into the Zaxxon when the time comes. Here's a pic of the now "working" Wells Gardner 19K4675.